Rebuilding your Eaton snout
These instructions were written specifically for rebuilding an Eaton M90 snout commonly found on '97-'03 GM 3800 Series engines, however, they can be used for other applications. If you have an M112 commonly found on Ford SVT Lightnings and Cobras, the procedure is the same. The M62 found on earlier GM 3800 Series engines had a keyed pulley and shaft as did the M90 found on Ford Supercoupes/XR7's. You don't need a special puller for the pulley, but the rest of the procedure is the same.
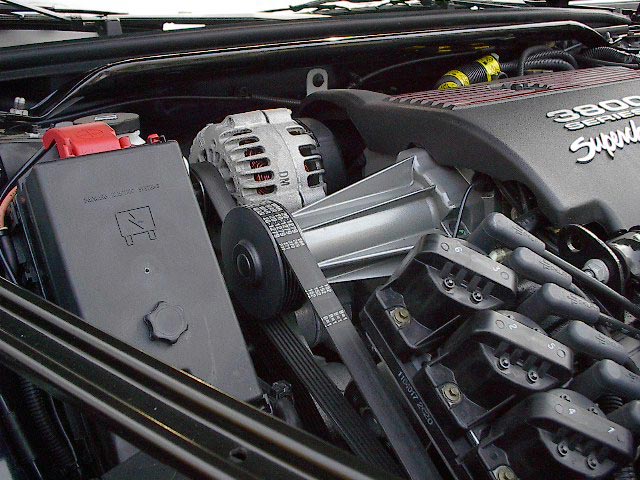
The first step in getting your snout off is to remove your belt and get the fuse box out of the way. You also may need to get your alternator out of the way also. You will now have to pull your supercharger pulley off using a special pulley puller, such as ones sold by The Pulley Boys depicted in the picture below. This is necessary in order to disassemble the snout later.
Now you want to take the fill plug out and remove as much of the fluid as possible from the snout. A turkey baster with a piece of tubing or a syringe works well. Remove the 10 bolts that hold the snout on. Once they are out, you can gently tap the snout with a rubber mallet or soft hammer until it pops off. Be careful to not pull your rotors out with the snout. You'll want to leave them in and seperate the snout from them.
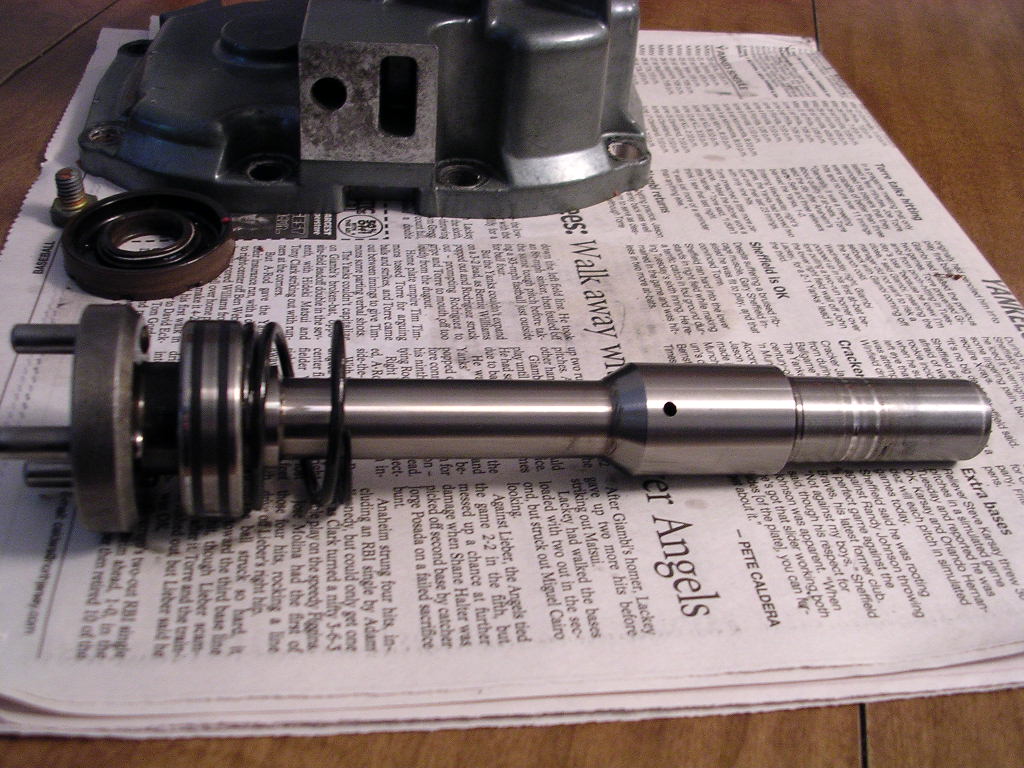
Now you can start disassembling the snout by first removing the retaining clip on the front end of the snout that holds the seal in. Using your rubber mallet or soft hammer, tap out the shaft from the front end of the snout. The shaft should come out fairly easily and will have one bearing still on it. There's a spring in there that will come out with the shaft also.
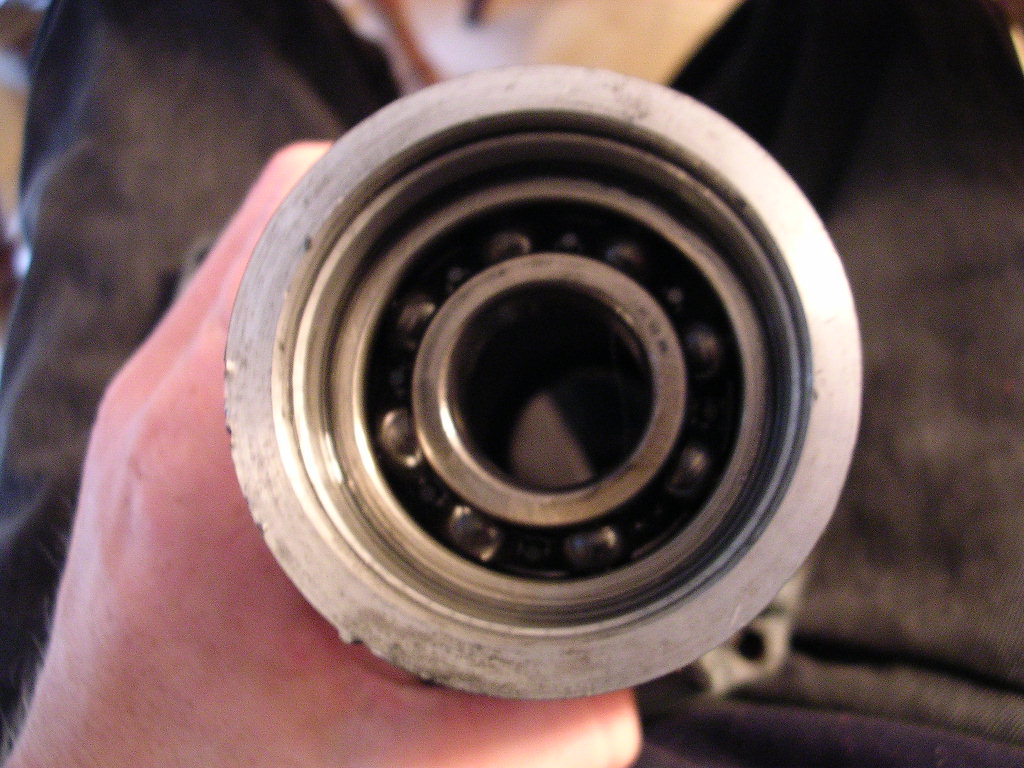
Now you can remove the bearing and seal from the snout housing end. From the back end of the snout, you can use a socket large enough to fit over the inner bearing race and an extension to lightly tap on the bearing to knock it out the front side of the snout.

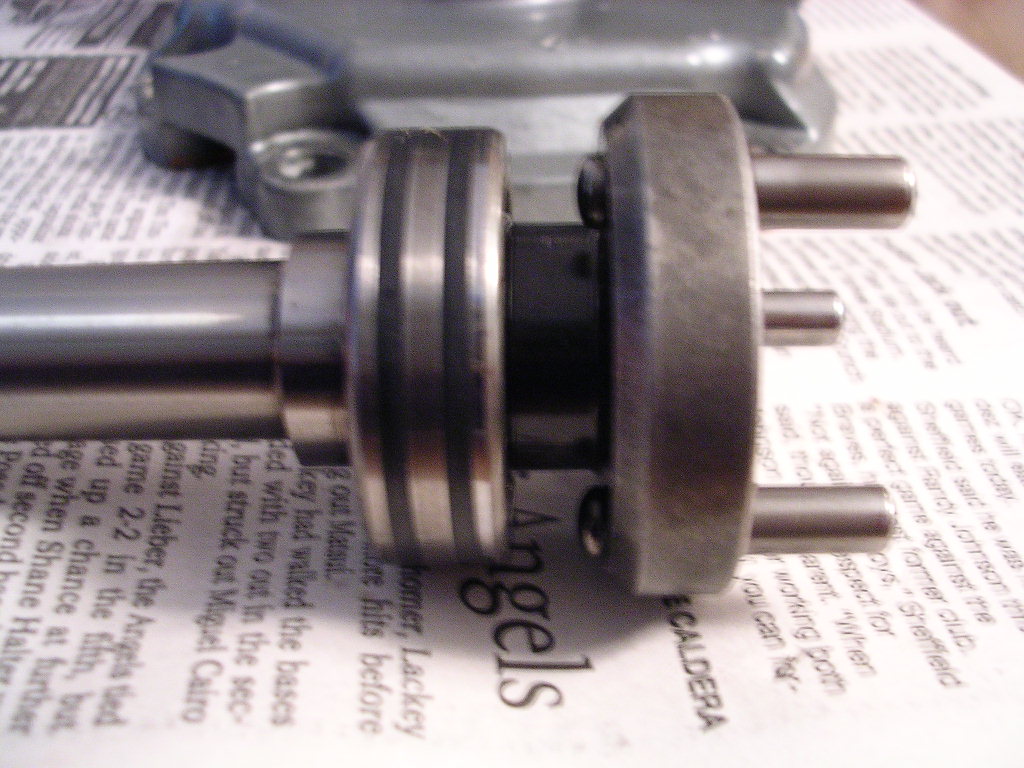
The next step is to remove the coupler end from the shaft in order to get the back end bearing off the shaft. This will require a press or a puller to remove. As you can see below, the end of the shaft that this coupler is pressed onto is splined. It's a good idea to just check the shaft for any significant scoring before reassembly. Usually I use a Scotchbrite pad to clean up the bearing surfaces before installing the new ones. Now you will need to press the new bearing and the coupler back onto the shaft. The splines are a fine pitch, so make sure it's lined up properly so you don't ruin the splines when pressing it back on. It's a good idea to use a very light oil to aid in pressing the coupler back onto the shaft.

After your shaft is back together, install the new bearing in the housing. Make sure the bearing is seated fully into the housing. Then slide the shaft into the snout and tap it back in, taking care to make sure the bearing is fully seated.
Finally, tap the new seal into place and install the retaining clip and you're done. Reinstall the snout onto the supercharger reversing the steps you took above to remove it. Before doing so, it's also a good time to replace your coupler as the holes tend to get egg shaped making the coupler loose and noisy. You can find couplers here
When reinstalling the snout, I recommend using Permatex #51817 gasket maker or GM #1052942 sealant and you'll need 2 bottles of GM #12345982 supercharger oil to refill the snout.
Rebuild kits with everything needed to do the job are available here. If you have any other questions feel free to send an email.